
Vertical Space: The Storage Dimension Most Homes Completely Ignore

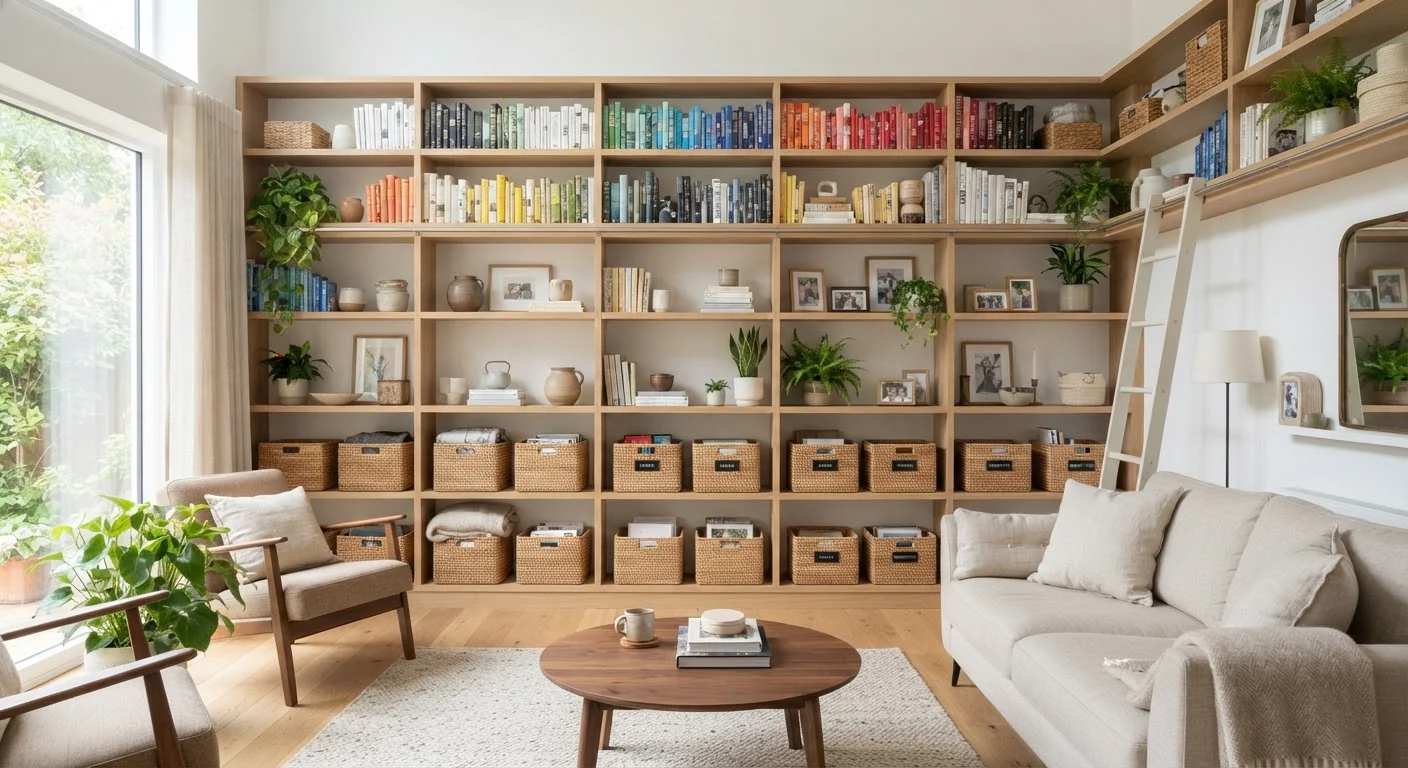
Photo: ShortwebArticles.com | Content For The Curious editorial
Key Takeaways
- Most homes use only the bottom half of their walls, leaving significant storage potential unused.
- Mounting shelves, hooks, and rails above eye level frees up valuable floor space.
- Vertical storage works in every room — kitchens, bedrooms, bathrooms, and garages alike.
- The right anchoring method matters: always secure shelving to wall studs or use appropriate wall anchors.
- Grouping items by frequency of use determines how high they should be stored.
Why Vertical Space Is the Most Overlooked Dimension
Most home organization advice focuses on what fits inside existing drawers, cabinets, and closets — a horizontal mindset that misses the dimension with the most untapped potential. The average American room has eight to ten feet of ceiling height, yet the usable storage in that room rarely extends above five or six feet. That gap between the top of your furniture and the ceiling is, in effect, free square footage you're already paying for.
Vertical storage isn't just for small apartments. Even generously sized homes fill up fast when storage is confined to floor level. If your home feels cluttered despite having reasonable space, look up — the solution is often literally above your head. This same logic applies outdoors too: vertical strategies work just as well in compact outdoor areas like balconies and narrow side yards.
For those in tight floor plans, combining vertical storage with other strategies makes a meaningful difference. See our guide on small-space storage strategies for approaches that pair well with what's covered here.
Stud Finder
Locates the wooden or metal framing studs inside walls so shelves can be anchored securely.
Drill and Drill Bits
Creates pilot holes and drives screws into studs or wall anchors.
Bubble Level
Ensures mounted shelves and rails hang straight and don't tilt over time.
Wall Anchors (rated)
Provides secure fastening in drywall when a stud is not present at the exact mounting point.
Pegboard or Slotted Wall Rail System
Creates a modular, rearrangeable vertical storage surface ideal for kitchens, garages, and craft spaces.
Over-Door Organizer
Turns the back of any door into shelving or pocket storage without requiring any drilling.
Step-by-Step: Claiming Your Vertical Space
The steps below walk you through the full process — from planning what goes where to mounting and loading shelves safely. Before you begin, gather the tools listed in the prerequisites.
What you will need
Audit your walls and identify unused vertical zones
Walk through each room and look at the space between your highest piece of furniture and the ceiling. In most homes, that gap — often two feet or more — is completely empty. Note which walls have unobstructed runs, where natural light falls, and which areas see the most daily clutter. This audit tells you where vertical storage will have the biggest impact before you buy anything.
Decide what to store vertically — and how high
Sort your belongings into three tiers: daily-use items (keep at eye level or below), weekly-use items (slightly above eye level), and rarely-used items such as seasonal décor or backup supplies (highest shelves). This hierarchy prevents the frustrating situation of needing something urgently that's buried behind a step stool trip. Items used less than a few times a year are ideal candidates for the uppermost shelves or high cabinet tops.
Choose the right mounting system for each location
Match your mounting approach to the room and the load:
- Bracket shelves on studs — best for heavier loads like books, kitchen equipment, or tools
- Rail-and-bracket systems — adjustable height makes them ideal for closets and pantries
- Pegboard panels — excellent for garages, craft rooms, and kitchens where tool or supply layouts change frequently
- Over-door organizers — no-drill solution for bathrooms, pantries, and bedroom doors
- Tension-rod shelving — useful inside cabinets to double stack lightweight items like cutting boards or lids
For closets specifically, look at whether extending a shelf run all the way to the ceiling would give you an extra storage tier — most standard closet shelving stops well short of the ceiling.
Locate studs and mark your mounting points
Use a stud finder to identify stud locations and mark them lightly in pencil. Standard wall studs in American homes are typically spaced 16 inches apart on center, though 24-inch spacing exists in some construction. Hold your shelf bracket against the wall at the intended height, use a level to confirm it's straight, and mark drill points through the bracket holes. Double-check all marks before drilling — moving a bracket a half-inch after the fact is far easier than patching an unnecessary hole.
Mount brackets, install shelves, and load systematically
Drill pilot holes, attach brackets firmly, then set the shelf across them. Give each bracket a firm tug before loading anything — it should feel completely solid. When loading, place heavier items toward the wall and on lower shelves within each tier. Use bins or baskets on high shelves to corral loose items and make retrieval easier. Label containers clearly on the outward-facing side.
Leverage doors and awkward corners
Doors are one of the most underused vertical surfaces in any home. An over-door organizer on a pantry door can hold spices, foil, and small appliances. The same principle applies in bathrooms (cleaning supplies, toiletries) and bedrooms (accessories, shoes). For awkward corners, consider corner shelving units that rise floor to ceiling — they convert a typically dead zone into a column of usable storage without consuming any wall run that furniture might otherwise use.
Always Anchor to Studs or Solid Backing
Don't Store Heavy Items Too High
Room-by-Room Considerations
Vertical storage looks different depending on the room. Here's how to think about it across common spaces:
- Kitchen: Mount a rail above the backsplash for hanging utensils and small baskets. Add a shelf tier above cabinets for serving platters and rarely used appliances. The open shelving vs. closed cabinet trade-off is worth thinking through here.
- Bedroom: Extend closet shelving all the way to the ceiling for off-season items. A shelf above a bedroom door is a natural spot for books or bins.
- Bathroom: Ladder shelves and over-toilet etageres use the vertical column that would otherwise be air. Over-door hooks and racks handle towels and toiletries without consuming counter space.
- Garage: Ceiling-mounted storage platforms are highly effective for bulky seasonal items. Wall-mounted rail systems handle tools and sports equipment. For a full approach to this space, see our garage organization guide.
Use Uniform Bins for a Cleaner Look
Finally, high shelving works best alongside a seasonal rotation habit — moving infrequently needed items up when they're off-season keeps prime storage zones clear. Our guide on seasonal rotation for closets and cabinets explains how to build that habit into your routine.
The content on this site is for informational purposes only and is not a substitute for professional advice. Always consult a qualified professional for guidance specific to your situation.